
Configure NGINX as a Content Cache Server: A Comprehensive Guide
As a web server, NGINX is widely used for its high performance, scalability, and flexibility. One of its lesser-known features is its ability to act as a content cache server. In this blog post, we will explore the process of configuring NGINX as a content cache server, including defining a minimum retention policy, configuring path regex routing, and discussing the different types of caching.
Why Cache in NGINX?
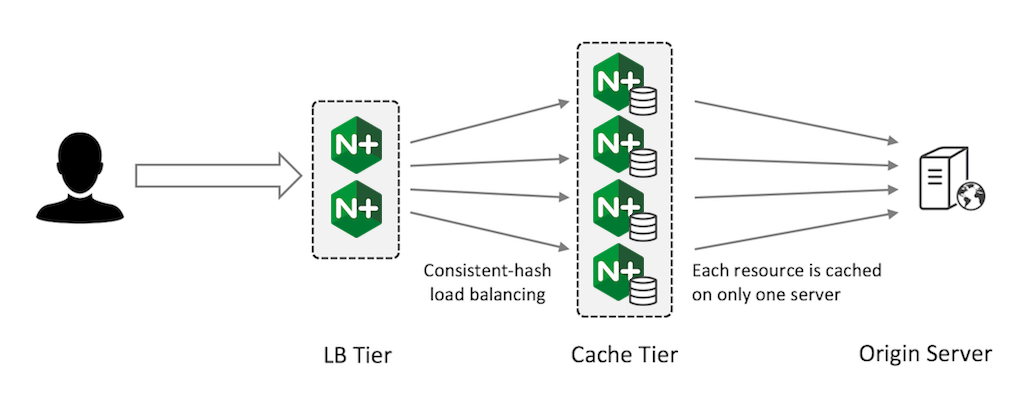
Caching in NGINX serves two primary purposes: reducing the load on your origin server and improving response times. When a request is made to your NGINX server, it first checks if the requested content is available in the cache. If it is, NGINX can return the cached content immediately, reducing the need for the origin server to process the request. This not only improves response times but also reduces the load on your origin server.
Defining a Minimum Retention Policy
Before configuring caching, you need to define a minimum retention policy. This policy determines how long NGINX will store cached content before it expires and is removed from the cache. You can define this policy using the proxy_cache_valid directive in your NGINX configuration file.
For example, to set a minimum retention policy of 1 hour:
proxy_cache_valid 1h;Configuring Path Regex Routing
To configure path regex routing, you need to use the location directive and specify a regular expression pattern that matches the desired URL path. For example, to cache all requests to /static/*, you can use the following configuration:
location ~* "^/static/" {
    proxy_cache static;
    proxy_pass http://origin-server;
}
In this example, any request to /static/* will be cached and served from the cache instead of being passed to the origin server.
Defining the Cache in the http Context
To enable caching, you need to define a cache in the http context using the cache directive. For example:
http {
    ...
    cache my_cache 64m;
}
In this example, a cache named my_cache with a size limit of 64 megabytes is defined.
Enabling the Cache
To enable caching for a specific location or server block, you can use the proxy_cache directive. For example:
http {
    ...
    server {
        listen 80;
        location / {
            proxy_cache my_cache;
            proxy_pass http://origin-server;
        }
    }
}
In this example, caching is enabled for all requests to the root URL (/) and proxied to an origin server.
Specifying Content that Should be Cached
You can specify which content should be cached using the proxy_cache_key directive. For example:
location / {
    proxy_cache my_cache;
    proxy_pass http://origin-server;
    proxy_cache_key $uri$is_args$cookie_NZ;
}
In this example, only requests with a specific cookie named NZ will be cached.
Different Types of Caching
NGINX supports several types of caching:
- Proxy caching: caches responses from proxied servers
- Static caching: caches static files
- Dynamic caching: caches dynamic responses from applications
Each type of caching has its own configuration options and use cases.
What’s Unique about NGINX as a Cache Server?
NGINX offers several unique features that make it an ideal choice as a cache server:
- High-performance: NGINX is designed for high-performance and can handle large volumes of traffic
- Scalability: NGINX can be easily scaled horizontally by adding more instances
- Flexibility: NGINX supports multiple types of caching and can be configured to meet specific use cases
- Integration: NGINX can be easily integrated with other tools and systems
In conclusion, configuring NGINX as a content cache server is a powerful way to improve response times and reduce load on your origin server. By defining a minimum retention policy, configuring path regex routing, and specifying which content should be cached, you can create a highly effective caching solution that meets your specific needs.
